Microsoft 365 subscriptions now allow you to change the subscription type
Microsoft appears to have made some welcome changes to how consumer Microsoft 365 subscriptions work. Previously, if someone wanted to move from Microsoft 365 Personal to Microsoft 365 Family, they first had to turn off recurring billing or cancel the subscription entirely. Only then could they purchase the plan they wanted.
This process frustrated many users, especially because refunds for unused time were not always guaranteed. However, while helping a user on a recent Microsoft Q&A thread, I noticed that this behaviour has changed. Users can now switch their Microsoft 365 plan directly from the Subscriptions section of the Microsoft account overview page. No cancellation or waiting period required.
How to change your Microsoft 365 subscription
To change your Microsoft 365 subscription plan, please sign into your Microsoft account on the services page: Microsoft account | Subscriptions
Once you have signed into your Microsoft account, you will see all your subscriptions connected with your Microsoft account. If you navigate to your Microsoft 365 subscription, then click “Manage” on the right-hand side of the tile.
This will take you to the subscription details page where you can view your subscription details and manage the subscription. You will want to scroll down until you see “Change subscription plan”
When you click onto that tile, it will show you the different plans you can choose from.
You can toggle between yearly or monthly payment. Each plan provides you with the cost per month/year and what each plan includes. You can choose which plan you wish to choose to by clicking onto “Switch plan”
From experience from switching from Microsoft 365 Family to Microsoft 365 Premium, the process is quick. You will get an email confirming your choice and payment was taken the same day for the subscription, which changed my billing date from the 27th of the month to the 17th of the month.
As I couldn’t find any announcement about this, from Microsoft, I am unsure if this is only region specific or specific to certain subscriptions. Despite this, it is a welcomed change.
Microsoft has begun emailing Microsoft 365 subscribers to inform them that Microsoft Publisher will be discontinued on 1st October 2026. This marks the end of support for the desktop‑publishing app after 35 years. In this post, we’ll look at why Microsoft is retiring Publisher, what will happen after the end‑of‑support date, and the best alternatives for anyone who still relies on Publisher today.
What is Microsoft Publisher?
Microsoft Publisher was first released back in 1991. Now, in October 2026, it will be discontinued after 35 years. Microsoft Publisher was first introduced as a program within the Microsoft Office family that allowed people to create projects such as flyers, brochures, newsletters, menus, labels and basic web pages.
Publisher had templates that allowed people to quickly make documents with ease without having to pay for expensive software to achieve the same job. This was beneficial for people who worked in small businesses, schools and community groups. It allowed anyone of any ability to create professional looking documents.
Why Microsoft is ending support for Publisher
Microsoft have since created tools such as Microsoft Designer and Clipchamp that allows people to create professional documents. These tools are cloud based and do more then what Publisher can do. Other Microsoft apps such as Word and PowerPoint allow people to do most of what they could do in Publisher. Microsoft Word allows you to create labels and leaflets and have templates available for people to use.
What will happen after October 2026
After October 2026, Microsoft Publisher will not be included in the Microsoft 365 download. This means you will not be able to download it onto your computer/device. If you have Microsoft Publisher as a standalone copy such as Microsoft Office 2021, then you should be able to install Publisher and continue using it even though it is not supported. However, Microsoft support may not be able to help you if you run into any problems with Publisher after it’s end of support date.
What can I do with my Publisher files
If you want to keep your Publisher files, Microsoft recommends you convert these files into .pdf files. Once you have done this, you can open them in Microsoft Word and Word will convert them from .pdf to .docx files. This way, you can keep those files and continue editing them when you need to make changes to them.
What are my alternatives to Publisher
Depending on what you are wanting to do will depend on what program/app is available to you. Most of what you can do in Publisher can be done in Microsoft Word or PowerPoint.
Microsoft alternatives
Tool
Best For
Microsoft Designer
Flyers, posters, social media graphics
PowerPoint
Brochures, menus, newsletters
Word
Text heavy documents
Clipchamp
Video based content
Web based alternatives (non-Microsoft products)
Tool
Strengths
Canva
Huge template library, easy drag‑and‑drop, great for small businesses
Adobe Express
Clean templates, integrates with Adobe ecosystem
VistaCreate
Marketing‑focused templates and branding tools
Microsoft Copilot and the use of AI
Microsoft is investing more into Copilot. The fact you can ask Copilot to create you a poster and it will create it for you is remarkable. Microsoft has Office Agent, which is a tool online, here: Office Agent, where you can ask it to create you a presentation, word documents and more. All you have to do is tell it what you are wanting to create, and it will create it for you.
The Microsoft Office page was redesigned last year. Now when you sign into your Microsoft account, you are landing straight into the M365 Copilot chat. You can then type what you are after in the box and Copilot will begin creating what you are looking for. You can try this out by signing into your Microsoft account here: Chat | M365 Copilot
Sometimes you may come across a purchase that you haven’t made. Now, Microsoft has made it easy for you to view purchases made using your bank details on the Microsoft & Xbox store. This article will guide you through the process where you can investigate where these charges have come through and what Microsoft account has made these charges with your bank information.
You will need to sign into your Microsoft account. Once you have done, you should see your payment methods on your account along with your Microsoft account balance. When the page loads, you should see a list of transactions in the past 60 days that have used your payment details.
Please can you click onto the hyperlink “Investigate“
This will open a side panel on the right-hand side of your screen which will display your bank details that are stored on your account and ask for a CVV code.
Please select the right card where money has been taken out of your account on. Then enter the CVV code that is on the back of the card. Once you have done this, please click onto submit.
This will load up the recent transactions for that card. This will include transactions from other Microsoft accounts that have used your bank details too.
Please click onto the blue arrow facing to the right to view more information about the charge.
This will bring up details about this charge, including part of the account it has been linked to. You can use this to sign into the account and cancel the subscription or request a refund.
Microsoft PowerPoint allows you to use subtitles when you are presenting your presentation. This setting is powered by Microsoft’s speech service. You can translate what you are saying into another language. This article will walk you through how to start using subtitles in PowerPoint online and the desktop app.
Before you enable this feature, you must have a microphone connected to the computer.
Subtitles in Microsoft PowerPoint desktop
In the desktop app there seems to be more options with how the text is displayed compared to the online version. The desktop app allows you to use the Windows settings to customize the font and the font size.
Activating this feature
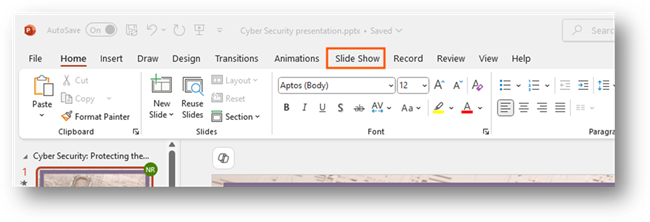
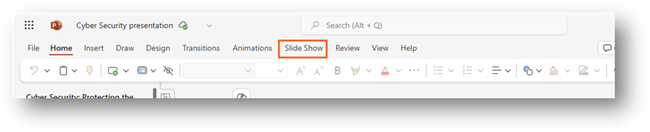
When you open your presentation, you will want to go to the tab Slide Show on your ribbon.
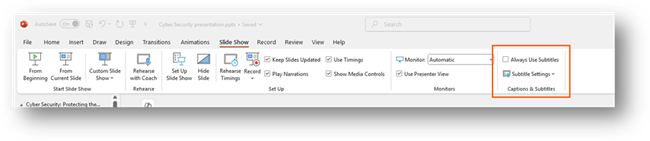
You will see options for your slide show that you can customize. You want to go to the section Captions & Subtitles on the far-right side.
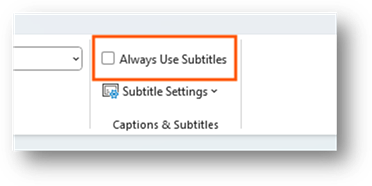
You will be able to see a check box that says, “Always Use Subtitles” and an option under that that says, “Subtitle Settings”. To enable the subtitles for the presentation, you can tick this box.
Once you have ticked this option, it will save it. So, when you go to present, it will display subtitles on your presentation when you speak. To turn off this feature, you will need to untick this box.
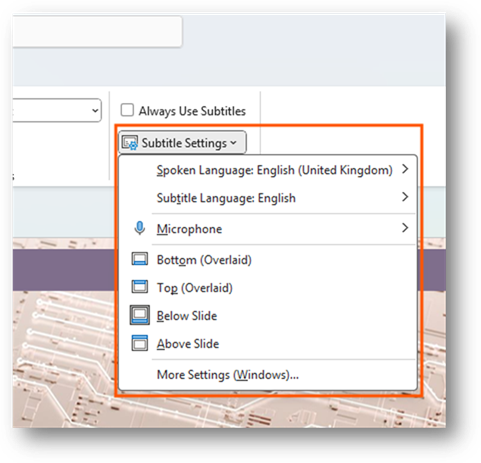
Subtitle settings
You can customize the settings for the subtitles. This allows you to do things like change the language or change where they are displayed when presenting. It is a way for you to adjust the settings for your audience.
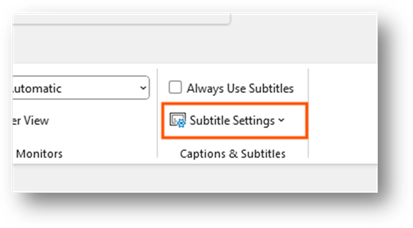
The settings option is found directly under the option to always use subtitles.
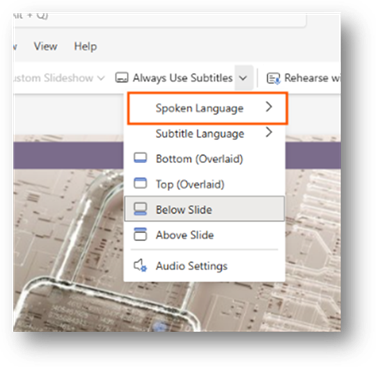
When you click onto this option, it will display a drop-down menu that displays a list of options.
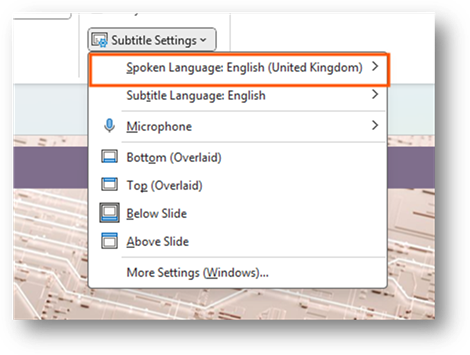
Changing the language, you are speaking
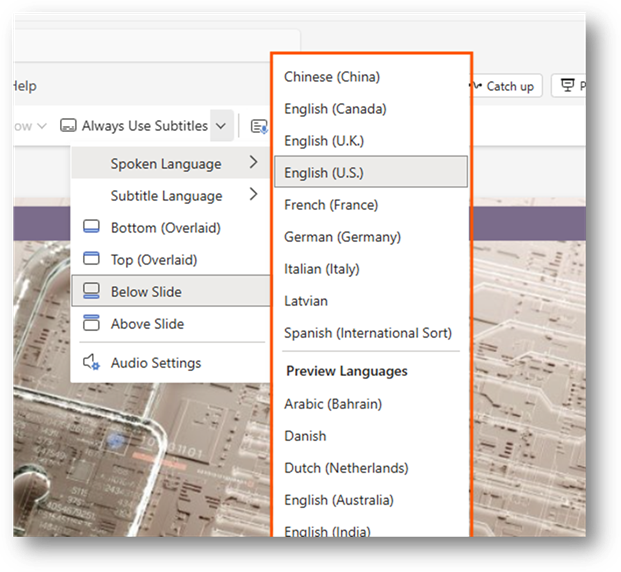
You can choose the language you are speaking in PowerPoint. To do this, you want to click onto the option “Spoken Language: …”.
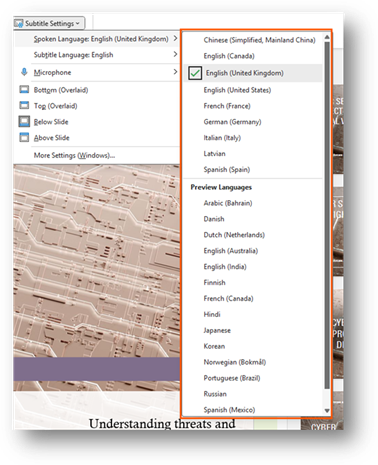
When you click onto this, it will display a list of languages you can choose from.
While there may be a language that isn’t there, Microsoft may choose to add this language in the future. Once you have found a language, please click on it to choose it. The menu will close.
By default, it will be set to the default language that is set in Microsoft 365. The preview languages are being tested. This means that they may not work as expected.
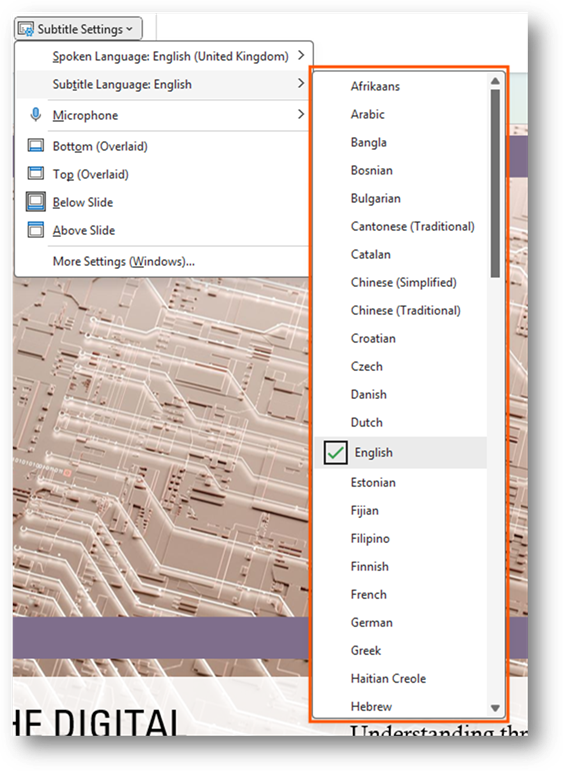
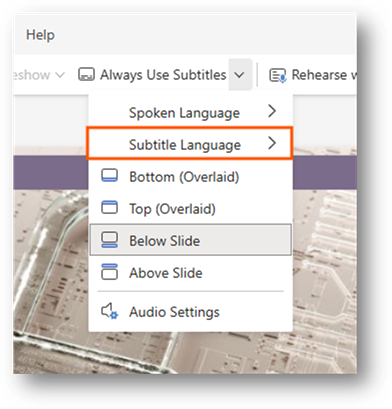
Changing language displayed
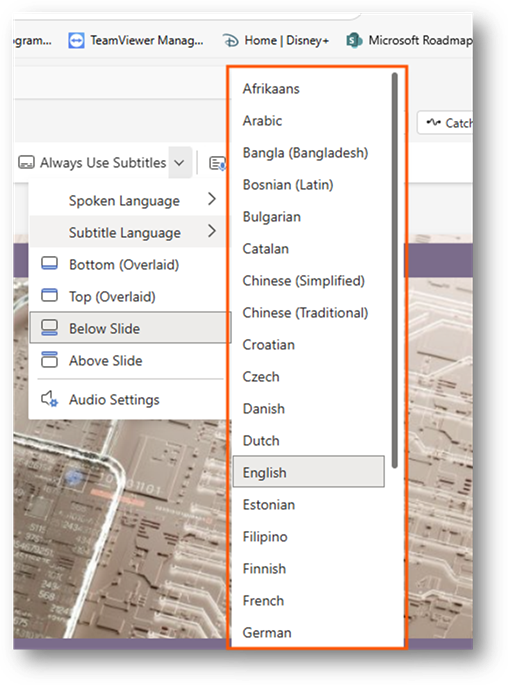
You can change the language the subtitles will be displayed in. By default, they will be set to your default language. To change the language, you will need to click onto the option, “Subtitle Language: …”
When you click onto this option, you it will display a list of languages you can choose from.
Once you have found the language you are wanting to choose. Please click onto the language to select it. This will close the menu for you.
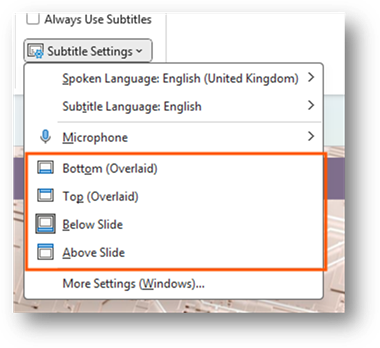
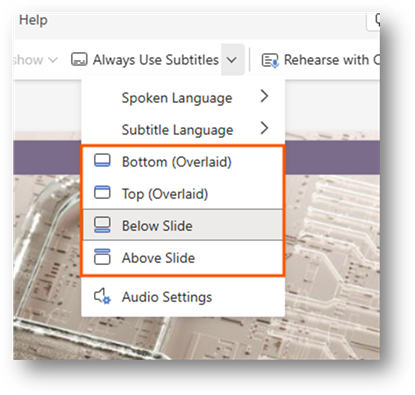
Position of text
You can choose where the subtitle will display on the presentation. This option can be found under the microphone setting.
You have four options to choose from. By default, it will display the subtitles at the bottom with an overlay. Once you select an option, the menu will close and save the option.
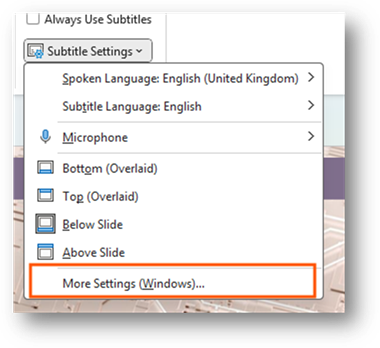
More windows settings
There are more settings that are built into Windows 11. You can access these settings by clicking onto the more settings option at the bottom of the menu.
The more settings option will open the Settings app for Windows where you can see settings for live captions on Windows.
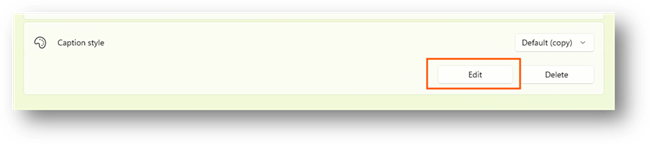
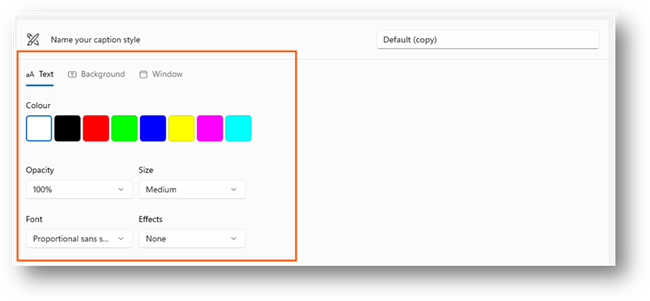
You will be able to adjust the style of the caption when displayed. This can be what colour the overlay is and what font and what the font size is. These are all located in the caption style option on the settings page.
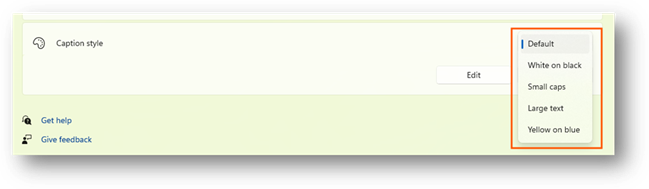
When you click onto the default option, it will list other options that you can choose from.
The options it provides you will be in a list.
Once you click onto the option you want, the list will close, and the option will be applied on all apps in Windows. You can edit the style by clicking onto the edit option.
This will open the style options where you can customize the text and background colour the text is put on.
Once you change anything, it will automatically apply these settings to the style. If the style is selected, it will display the changes throughout Windows. Once you have finished, close the Settings app, and navigate back to your PowerPoint presentation.
Subtitles in Microsoft PowerPoint online
If you are using the online version of PowerPoint, you do have the option to enable subtitles over your presentation. You will notice that there aren’t many options compared to the desktop version of PowerPoint.
Activating this feature
When you have opened your PowerPoint on a web browser, please navigate to Slide Show on the ribbon.
When you have selected the slide show option, you will see the options for the presentation when it is presentation mode.
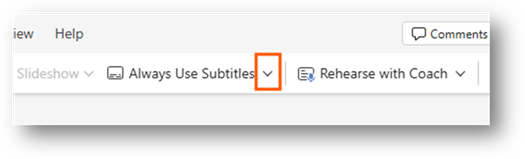
Along the menu bar, you will see an option called “Always Use Subtitles”
To enable subtitles, you must click onto the option which will highlight the button to show this is enabled.
Once enabled, you will be able to start your presentation. When you start speaking, the subtitles will appear on your screen. To disable subtitles, just click onto the button again. This will return the colour of the button back to white and will disable the subtitles on your presentation.
Enabling your microphone
By default, the browser will block the web app/web page from accessing hardware on your PC. This will include hardware such as your microphone and camera. This means you must enable the web app/website to access your microphone.
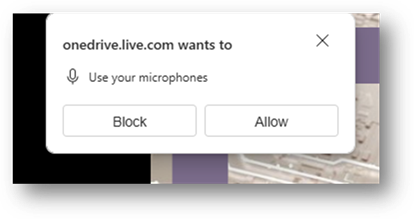
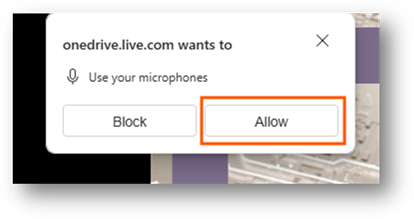
When you connect your microphone to the computer or go to present, it should request access to your microphone.
If this request appears, please click onto allow
What happens if I don’t get a request from the website/web app?
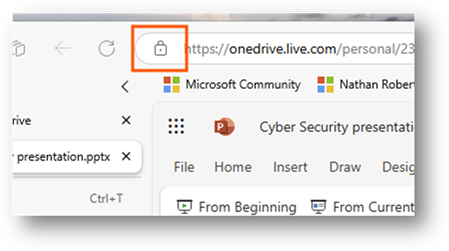
If this doesn’t appear, please click onto the padlock icon on your address bar at the left-hand side of the URL.
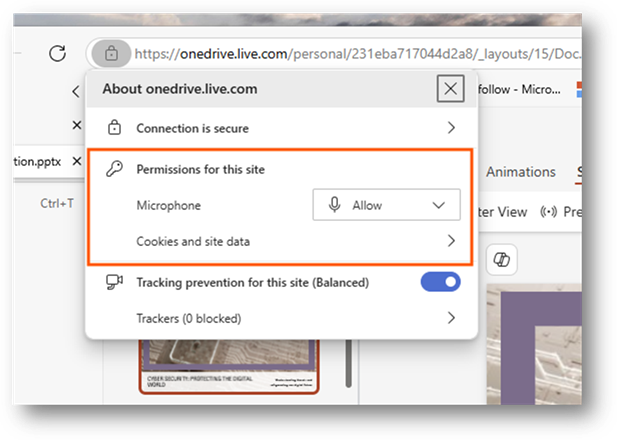
This will produce a drop-down menu showing information about the site. One of the options will be permissions for the site.
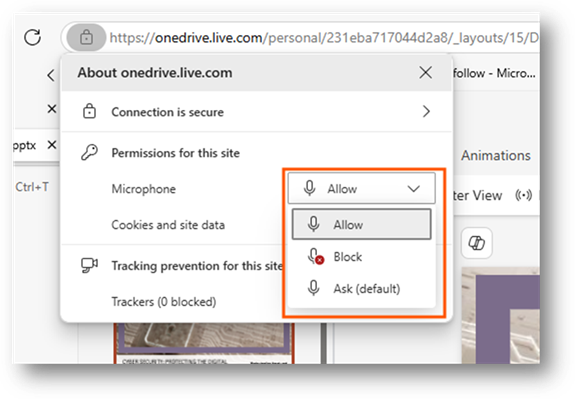
Please make sure that the microphone is set to allow. If it is blocked, please click onto the drop-down option for the microphone and change it to allow.
Once this setting has been changed, please refresh the site by pressing F5 on your keyboard or the refresh button on your web browser.
Subtitle settings
To access the subtitle settings, you will need to click onto the arrow pointing down on the right-hand side of the option to enable subtitles.
Once you click onto this button, the setting will display on a drop-down menu.
Changing the language, you are speaking
You can change the language you are speaking in PowerPoint. To do this, please click onto the setting called “Spoken language”.
This will expand a drop-down menu at the right-hand side showing a list of languages to choose from.
You can click onto a language you are going to be speaking in. This will save to your profile. By default, it will be set to the default language PowerPoint or Microsoft 365 is set to.
The preview languages are being tested. This means that they may not work as expected. If they don’t work, please submit feedback to Microsoft so they are able to work on this.
Changing the language displayed
You can change the language that is displayed in the captions on screen. To do this, please click onto the setting called “Subtitle language”
This will expand a drop-down menu on the right-hand side of the option that will display a list of languages to choose from.
Once you click onto a language, it will save this and close the menu. Each time you open a PowerPoint presentation and present with subtitles. It should remember the language selected.
Position of text
You can set the position of the subtitles when presenting. To do this, please select from one of the options in the setting menu.
Once you have chosen a location, the menu will close, and the setting will be applied. By default, it will display at the bottom of the presentation.
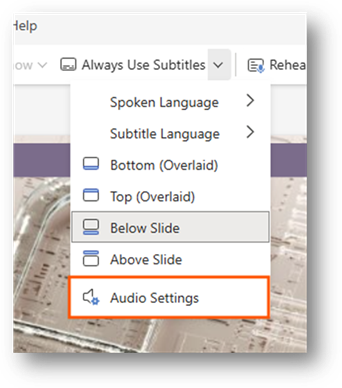
Audio settings
You can access audio settings where you can choose which microphone to use. To access this setting, please click onto “Audio settings”.
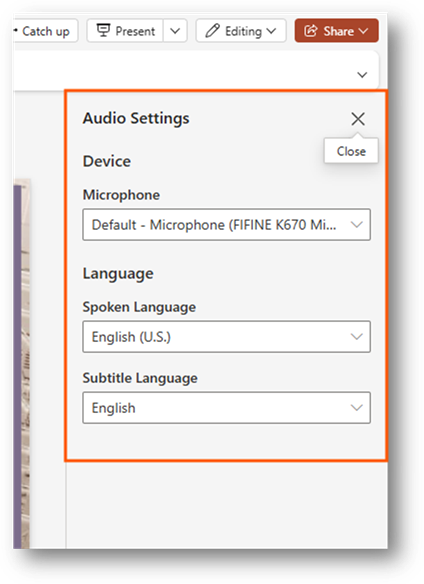
This will open the settings on the right-hand side of your screen in a pane.
You will be able to choose which microphone you want to use.
In Microsoft Office your able to create links to other documents and web pages in Microsoft Office. This guide will walk you though how to do this step by step with pictures so you can see exactly what I am talking about.