
Keeping on top of tasks can often be challenging. The good news is, there are tools available to help you manage your tasks and help keep you organised. I have written this article to help shed some light on tools that are available that can hopefully help you manage your tasks in your day-to-day world.
Viva Insights
Microsoft Viva is a product that is built into Microsoft Teams and allows you to send praise to colleagues, breathing exercises to help with stress, voting on how you are feeling for each day, help with wellbeing, and help with productivity. Throughout this article, I will focus on the productivity aspect of Viva Insights.
How to get to Viva Insights
To get to Viva Insights, you will need to open Microsoft Teams via the app or by going to the website. Once you have signed into your organisation account, you will be directed to the Teams homepage where you can see all your teams and/or classes.
On the left-hand side, you will see the navigation bar for Teams where you can see Activity, Chat, Teams, Calendar, and calls.

Under calls, you will see the ellipsis icon (…) which has been underlined in white. This brings up other apps that has been added to Teams. The apps you see will vary depending on what apps have been added.
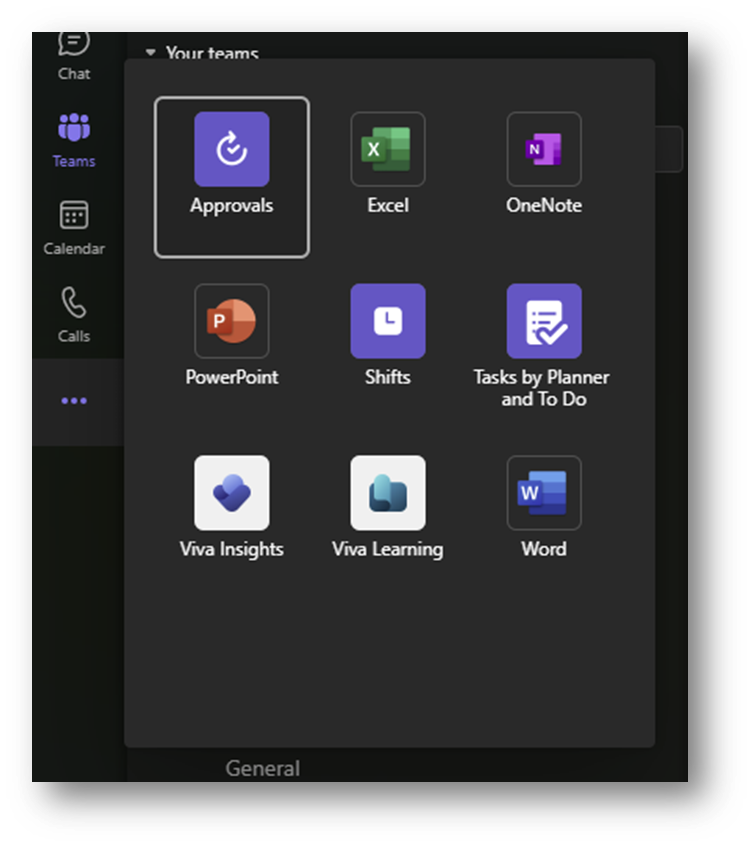
One of the apps you should see is Viva Insights. On the image above, this is on the bottom, under PowerPoint.
If you don’t see Viva listed on the apps list, then this could be because your administrator has not enabled Viva to be used in the organisation and you will need to speak to them about this.
Productivity
The productivity page shows suggested tasks which are based on emails, recent activity, and tasks which have been created from contacts which have been marked as important You see any meetings that are upcoming and will give you an option to choose whether you are attending the meeting or not.

This tool allows you to see upcoming events on your calendar which you haven’t responded to. You will be able to see the date and time these events are and will have an option choose whether you will attend the meeting or not via the RSVP option.

The RSVP option is on the bottom right-hand side, as seen in the image above, which will allow you to choose from two options.

Tasks that appear in the list will give you the option to pin them so they will move to the top or you can mark them as done.
Viva Commute
You can set up Viva Insights to create notifications telling you to wrap up your day. These notifications are visible in your notification feed in Teams.

When you click onto these notifications, you are taken to the Viva Commute page which allows you to begin your digital commute and view meetings, tasks that need completing or items added as a task.

When you click onto begin your commute, you will be taken to a page where you will view your meetings for the next day.

You will be able to view your day tomorrow which takes events from your calendar and places them in order. You have the option to delete any events that show up on the list. This will remove them from the calendar.
When you click next, you will be able to view your tasks.
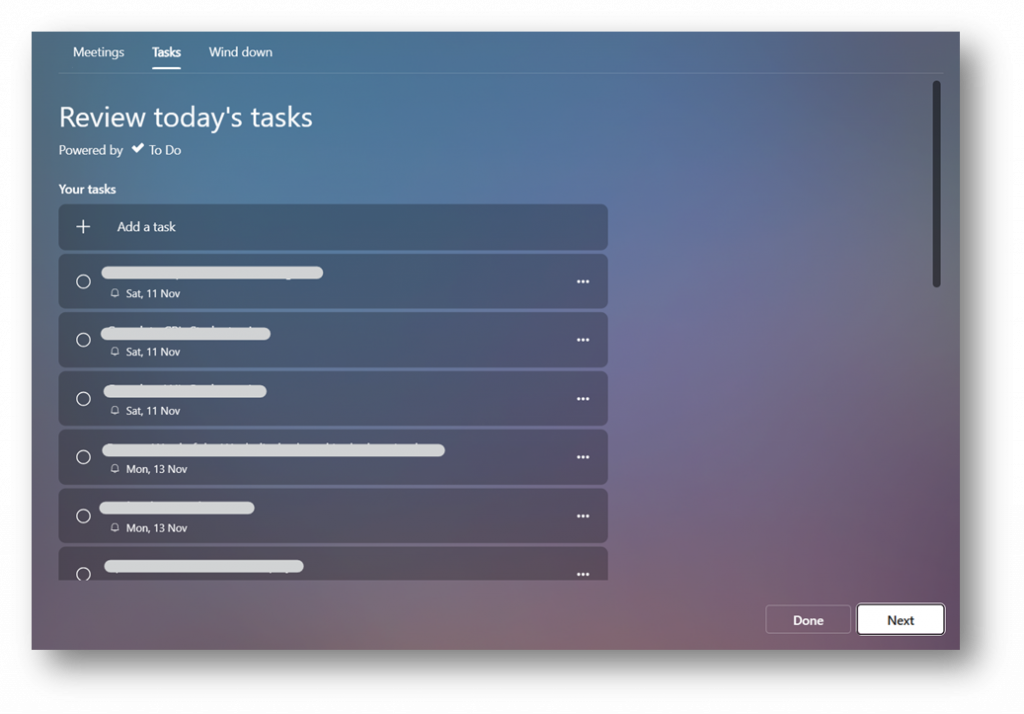
Tasks are arranged by due date so you can see what tasks need to be completed and when. You can choose to add tasks to this list, but will need to edit the tasks you add within the ToDo app or ToDo website.
Microsoft ToDo App
Microsoft ToDo is an app that allows you to manage your tasks. The app is available to download via the Microsoft store, Apple store, Google Play store. You can access the app via it’s own website: My Day – To Do (live.com) or access it via Outlook.
I find this app useful for managing tasks and managing my time to enable me to be more productive. The app allows you to set reminders, categories your tasks (If using web app) and set due dates for tasks to be completed.
If you have downloaded the ToDo app onto your device, you can manage your tasks directly from your phone, computer, and device.
Creating a task
You can create tasks by clicking onto add task at the bottom of the screen, as shown in my screenshot underneath.

When you have finished writing the task, you have a few options on the right-hand side of the task. The calendar option (Underlined in red) allows you to choose a due date.

This will bring up a calendar where you can choose a deadline for when this task should be completed. This is ideal as the app will order your tasks automatically by its due date, allowing you to focus on tasks that are due soon.
The clock icon(Underlined in red) allows you to set a reminder for when you want to be notified by the ToDo app to start working on the task.

This is ideal for when you want to set time aside to work on tasks. I often do this with my tasks so I know what I should be doing as we are often busy and may forget to do something.
The Calander icon with two arrows in a circle (underlined in red) is the re-occurring icon.

When you click onto this icon, you will be able to choose from daily, weekly, monthly and a customized re-occurrence.

When you choose when you want this task to re-occurrence and you save the task, when you mark it as complete, it will show in your tasks as completed but will re-create a new one with the subtasks and due date and reminder set for the next time you want this task due again (using the re-occurrence).
This is useful on the tasks that need to be re-created again and again. You only need to set it once and rest easy that the task will re-appear again when it is due. I do this when setting a task to look through abuse reports on the community.
Attaching files to the task
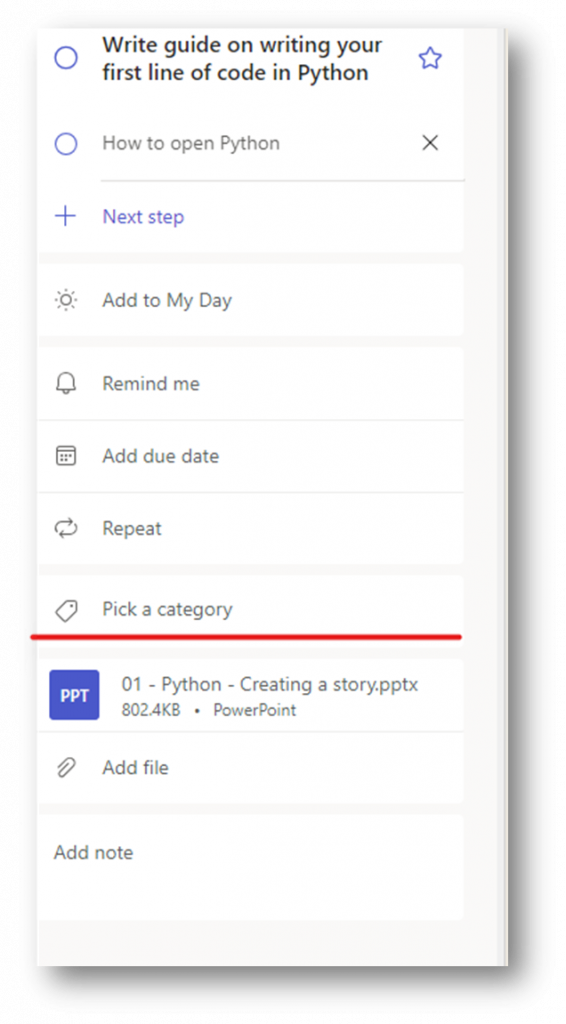
Once you have created your task, you can click onto it to view more options. You can choose to reset the date when you wanted to be notified about the task and if you want the task to re-occur. But you can choose to add a file to the task.

This option brings up a dialog window where you can choose to attach a file you want. This shows on the file above the add file option.

You can attach multiple files to tasks, or you can add links to these files via the add note option, allowing you to quickly access documents you need to for the task.
Applying categories to your tasks
If you are using the ToDo web app, via the website, you can add a category to your task. The category option is under repeat (underlined in red).
When you click onto this option, a dropdown menu showing all of the categories you have created in Outlook will be displayed.

You can type in the pick a category box which will filter the list, or you can scroll through the list until you see a category you want to use. When you have found one, click onto it and it will apply it to the task.

This will show on the task underneath the task title. I often use categories to help me see what the task is referring to. In the task above, I can see that the task I need to do is to do with my school club. I can choose to filter by category so I can see what tasks need doing for each category.
Viewing my day in ToDo
Each day the my day will refresh and display tasks that are due to be completed today.
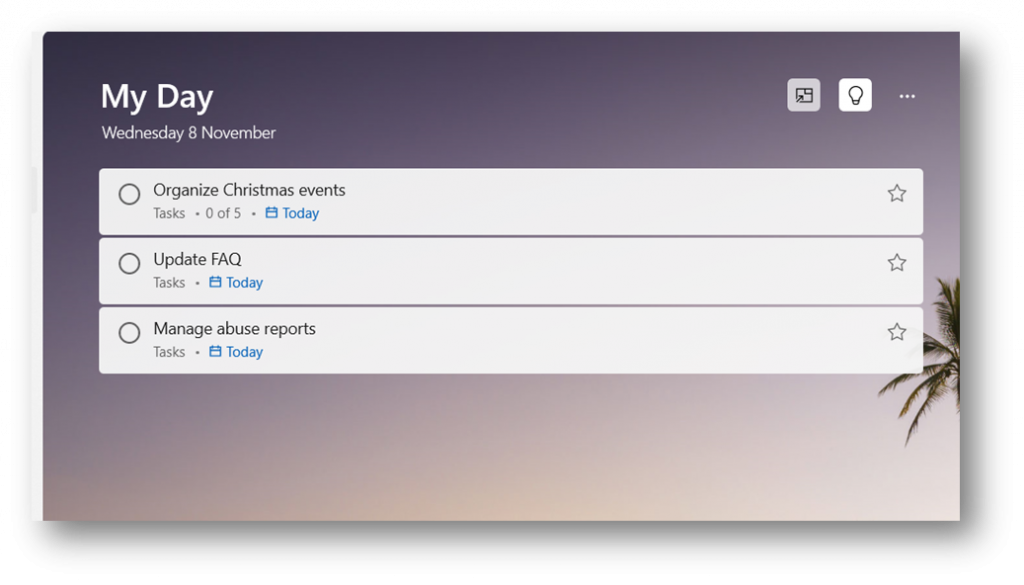
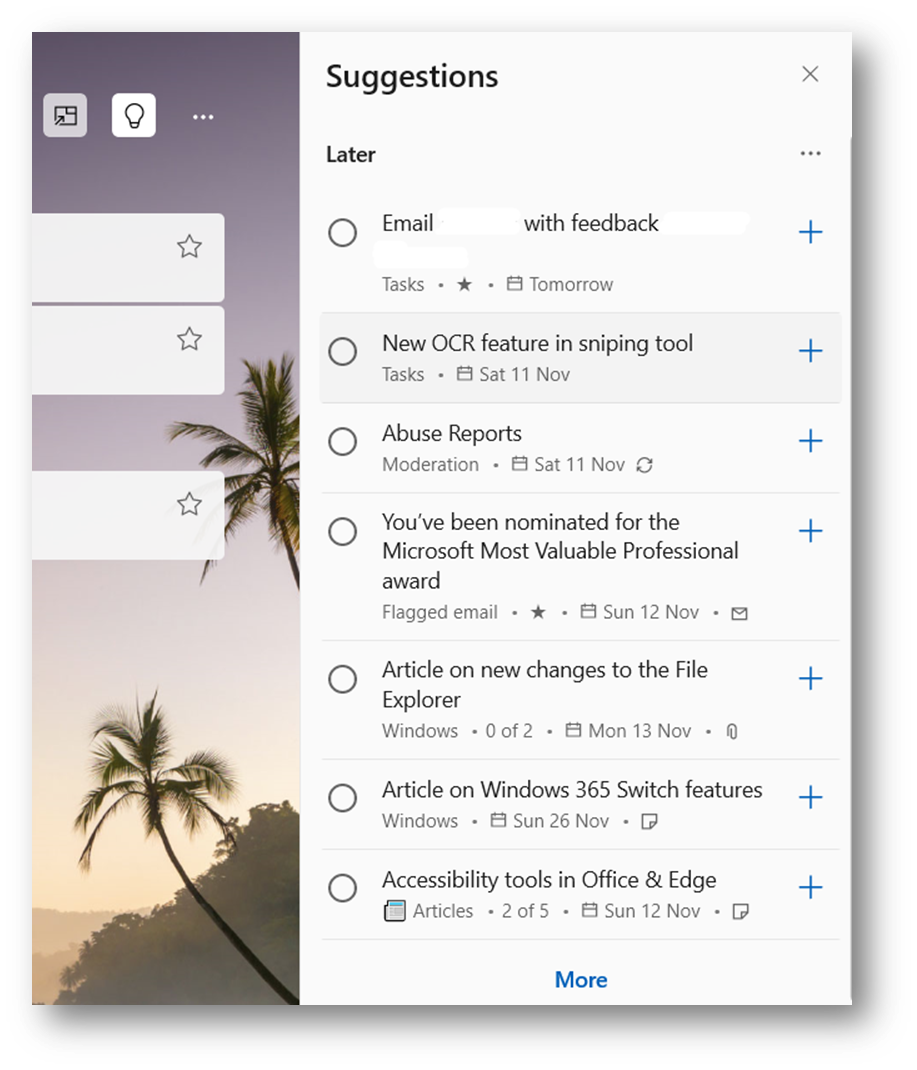
You can click onto the lightbulb option, sometimes labelled suggestions, in the top right-hand side (Underlined in red) to bring up suggested tasks that are due soon or that may be overdue tasks from previous dates.

After you have clicked onto this icon, you will see your suggested tasks appear on the right-hand side of your screen.

You will be able to see upcoming tasks that are due soon; tasks that have been recently added; and any tasks that are overdue. Tasks that are overdue will appear in red so they stand out. If you wanted to add a task to your day, you will need to click onto the plus icon on the right-hand side of the task. This will add the task to your day so you can work on the task.
This is a good way to keep on top of tasks that you have added in ToDo and allows you to reduce the chance that you will forget to complete a task. If you have the ToDo app on your phone, you will get notifications from the app telling you that you have tasks due today.
Marking tasks as completed
You can mark tasks as completed by clicking into the circle on the left-hand side of the task (underlined in red).

When you mark a task as complete, the task is moved from view into a completed section. This allows you to focus on the other tasks you must work through for that day. You will notice when you click onto a task with multiple subtasks, you can tick each subtask one by one to allow you to keep track on what you are doing on that task.

This is useful for large tasks that have multiple mini tasks to complete, especially if these tasks are to be completed over more than one day. When you come back to it you can easily see where you are currently and can continue working through the task.
Using ToDo in Outlook (new) app or Outlook.com
In Outlook.com and the new Outlook app (That is currently in beta), you can access ToDo and calendar using the ToDo icon on the top window bar on the right-hand side (underlined in red).

When you click onto this you will see your ToDo or Calendar appear on the right-hand side of the screen. Everything on the screen will adjust so it can fit everything on the screen, and you can select to show your calendar or ToDo list. If you have multiple email accounts added, you can click onto the email account displayed next to tasks to select a different account or to select a different task list.

In Outlook, I always prefer to view all my tasks and have a different window open with the ToDo app displaying my day. This is because in the side panel showing your tasks in Outlook, you are unable to see sub-tasks that need to be completed.
You can add tasks using the ToDo list in Outlook.com or in the new Outlook app by holding your left click button on your mouse and dragging your email to the side where the ToDo app is open. You will notice that the panel will display two boxes (as shown underneath)

At the top you can add the email as an event, allowing you to create an event that is added to your calendar (underlined in red). You can also create a task (underlined in orange) where the email will be attached to the task (just like a file) so that you can refer to it when you are thinking about completing the task.

When the task is added, you will notice the subject of the email is the task title. You can click into this and change the task title. The star on the right-hand side marks the task as important.

Under the task, you will notice that you have an envelope icon with the word email. This shows that the task contains a link to an email. To edit the due date, reminder, category and additional files and information, you must go back to the ToDo app then navigate to tasks where you will see the task that has been added (underlined in red).

You will be able to click onto the task where the task information will show on the right where you will be able to edit the task information or click onto the blue link to open the email in a new window.

As soon as you have edited the information for the task, it will save and will show in my day when the task is due. If you have forgotten what was mentioned in the email, you will be able to click onto the blue open in outlook link which will open a pop-up window that will display the email.